

5 Substack Settings to Make your Newsletter Look Professional
And promote your events/products too!… Details below ⬇️

Hi friends!
First, thank you to all who joined the Canva for Substack Do Session! If you did not make it, the recording and handouts are available below.
But, no worries! This article is helpful even if you did not join the workshop and have never met me and don’t know my workshops.
Just search for “hidden feature” to skim this article.
For good karma, if you learned something, say thanks in the comments, or ask your question there. If you know more tips like these… Let me know in the comments.

Some things I did not manage to say in The Canva for Substack Session:
I have shared with you the workbook with 7 essential templates for your Substack so you can build your digital identity, brick by brick, + a bonus one. What I did not mention is how to get consistency and save time with them. Example: For each new post you write, duplicate one of the pages on template five as your article’s first image. This one will be your article’s cover. (I normally duplicate the first page) and then make edits to that duplicate. Advantages: 1. You will have all your images in one place. 2. Download just the page you worked on and add it on your publication 3. With the guidelines, you will know where to place text without getting them cut off. The same system works for any other template.
You know probably how to add a photo in your article. You press the image icon. Self explanatory. Hidden feature (1) is that there is an AI image generator built into the image menu→ You really have no excuse to leave an article empty of images.

The Bonus Template + instructions for the “made by human” stamp are included in the workbook. But you all can just download and use my stamp below! (The template I’ve shared includes the process of making my stamp. It is super easy!) Use case: This stamp is for those who want to show your readers a real human is behind the publication. There’s a few of us left, and that is important to show!
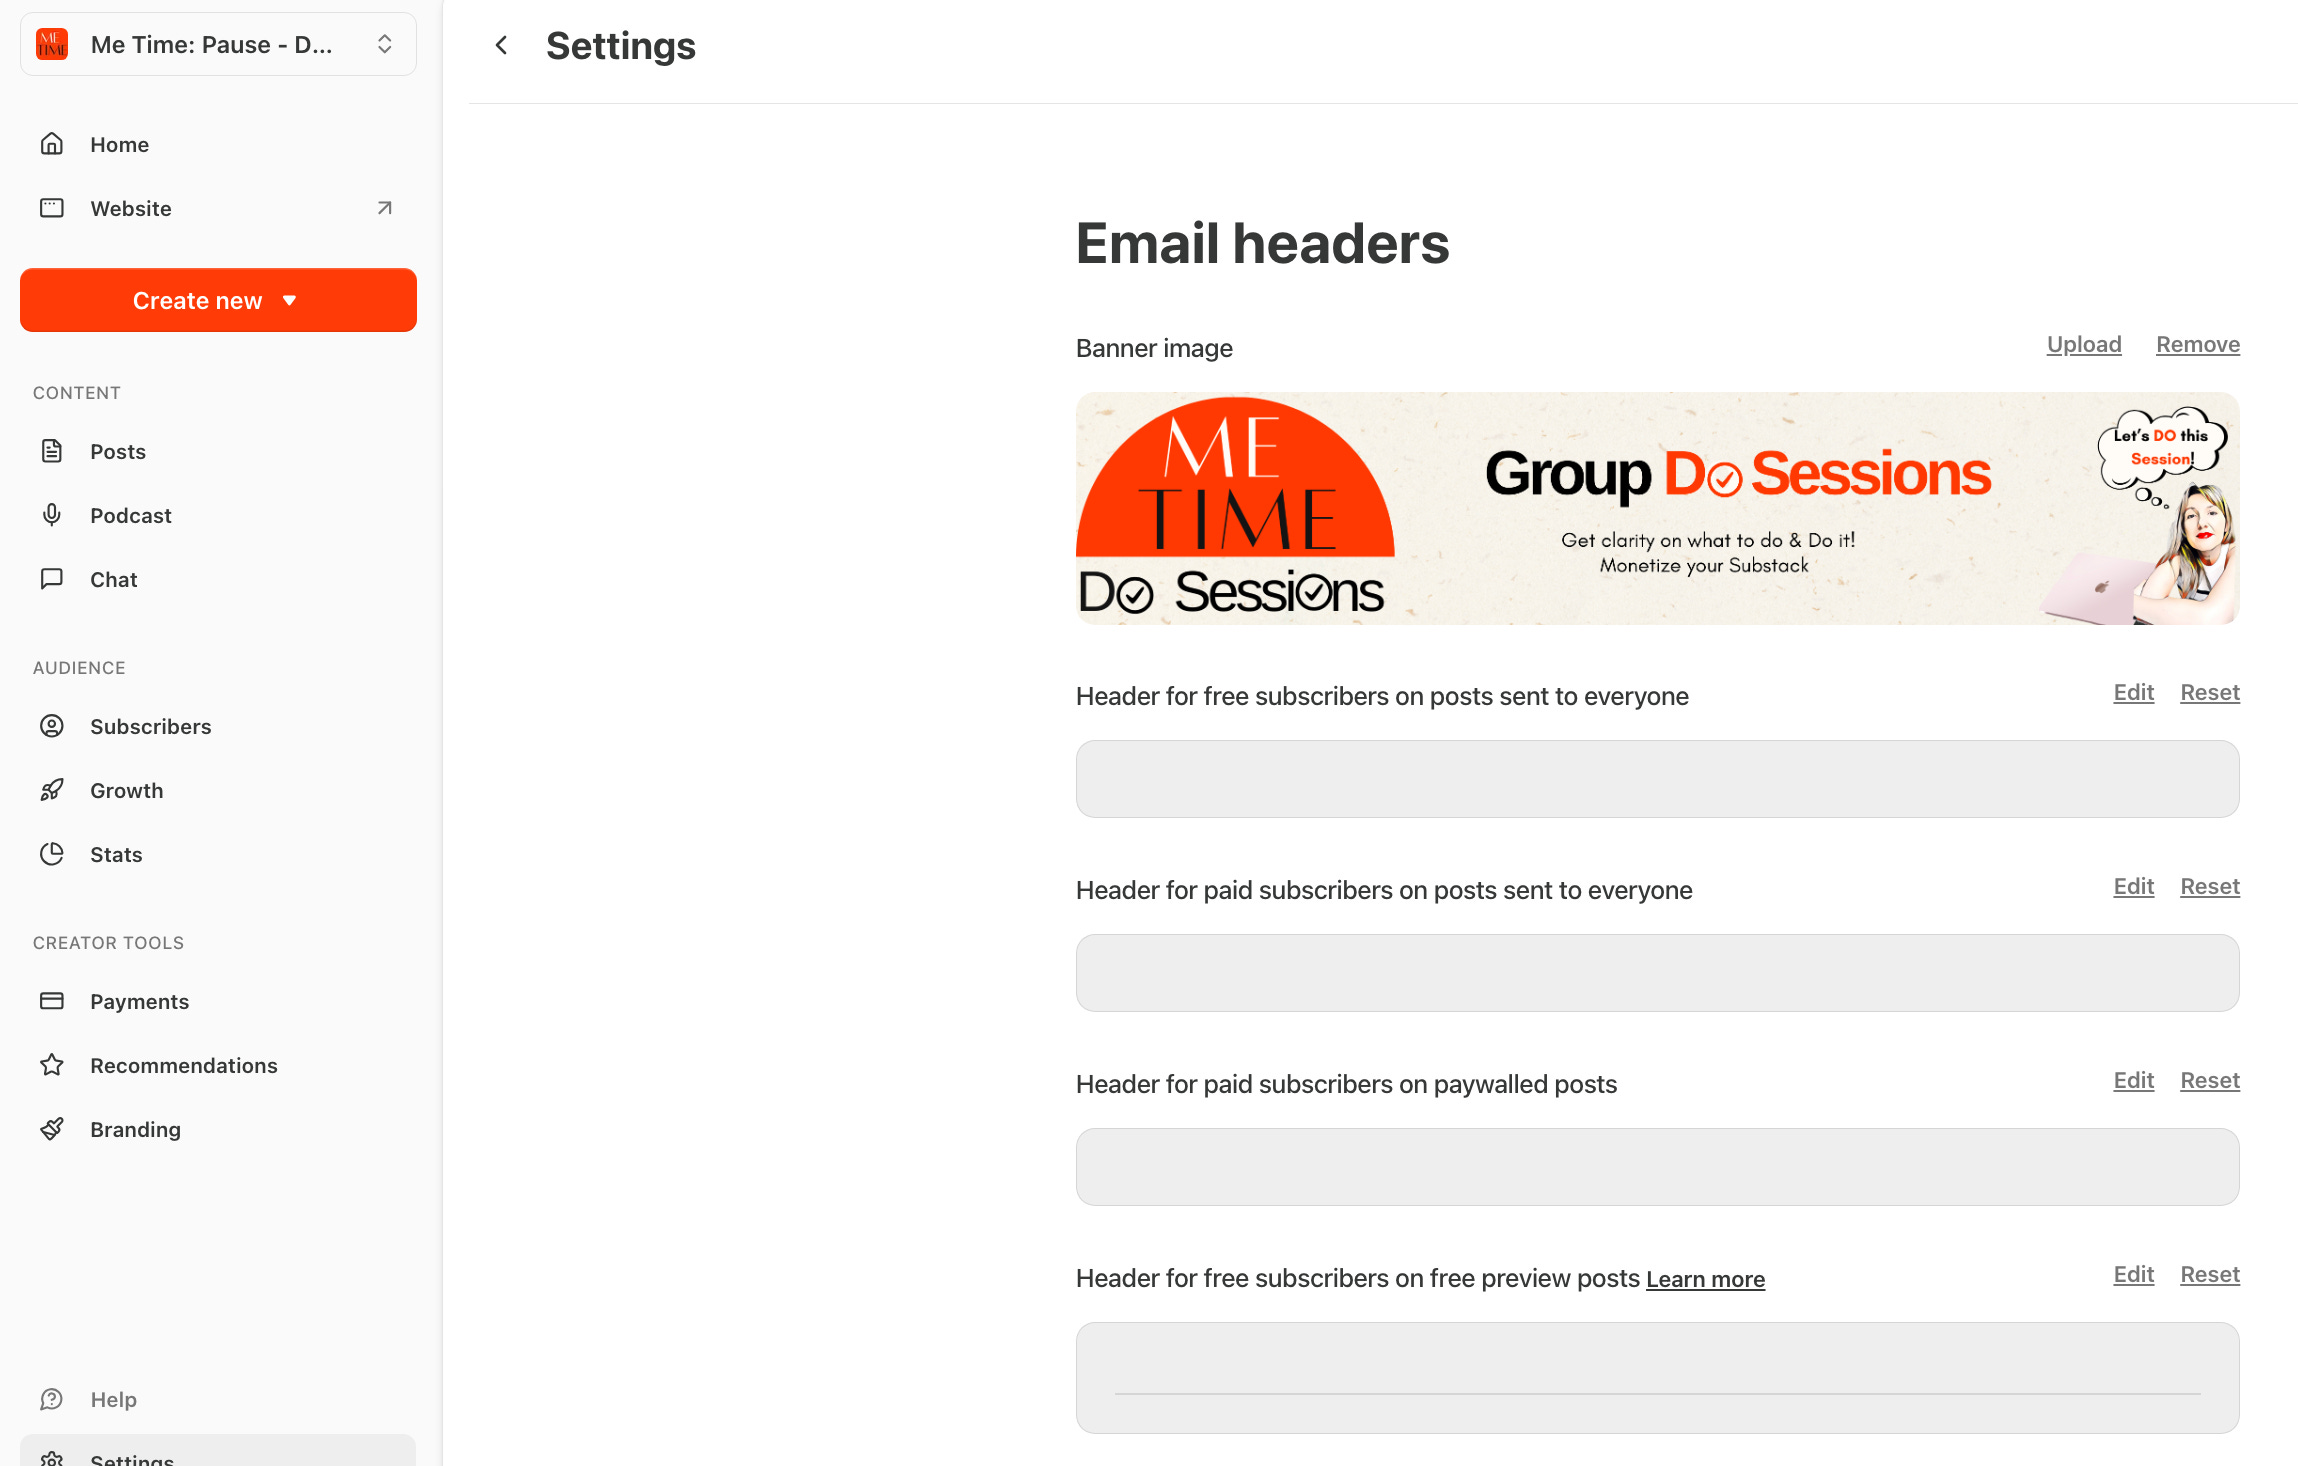
The Email Banner (hidden feature 2) This is where you find the setting.
Look for Email Headers in your Substack → Dashboard → Settings. The first tab is called Banner Image. That is what your template 4 is for. This banner shows on top of each email (or newsletter) that goes out as an email. Every single time (well if you add a banner in the setting that is…).
Use it as a built-in way to promote your offering, upcoming events, or to stand out with your branding.
Hidden Feature 3: There are also Email footers. Different ones for different types of subscribers. Here you can link to your T&Cs, put your Ko-fi link on free posts, and you should put your legal disclaimer here too (get it free from Legally Speaking when you subscribe). BUT keep it short. I did not manage… This also goes out on every email even if you do not see it when you draft. So if you add a banner and footer remember they are there!

Hidden Feature 4:
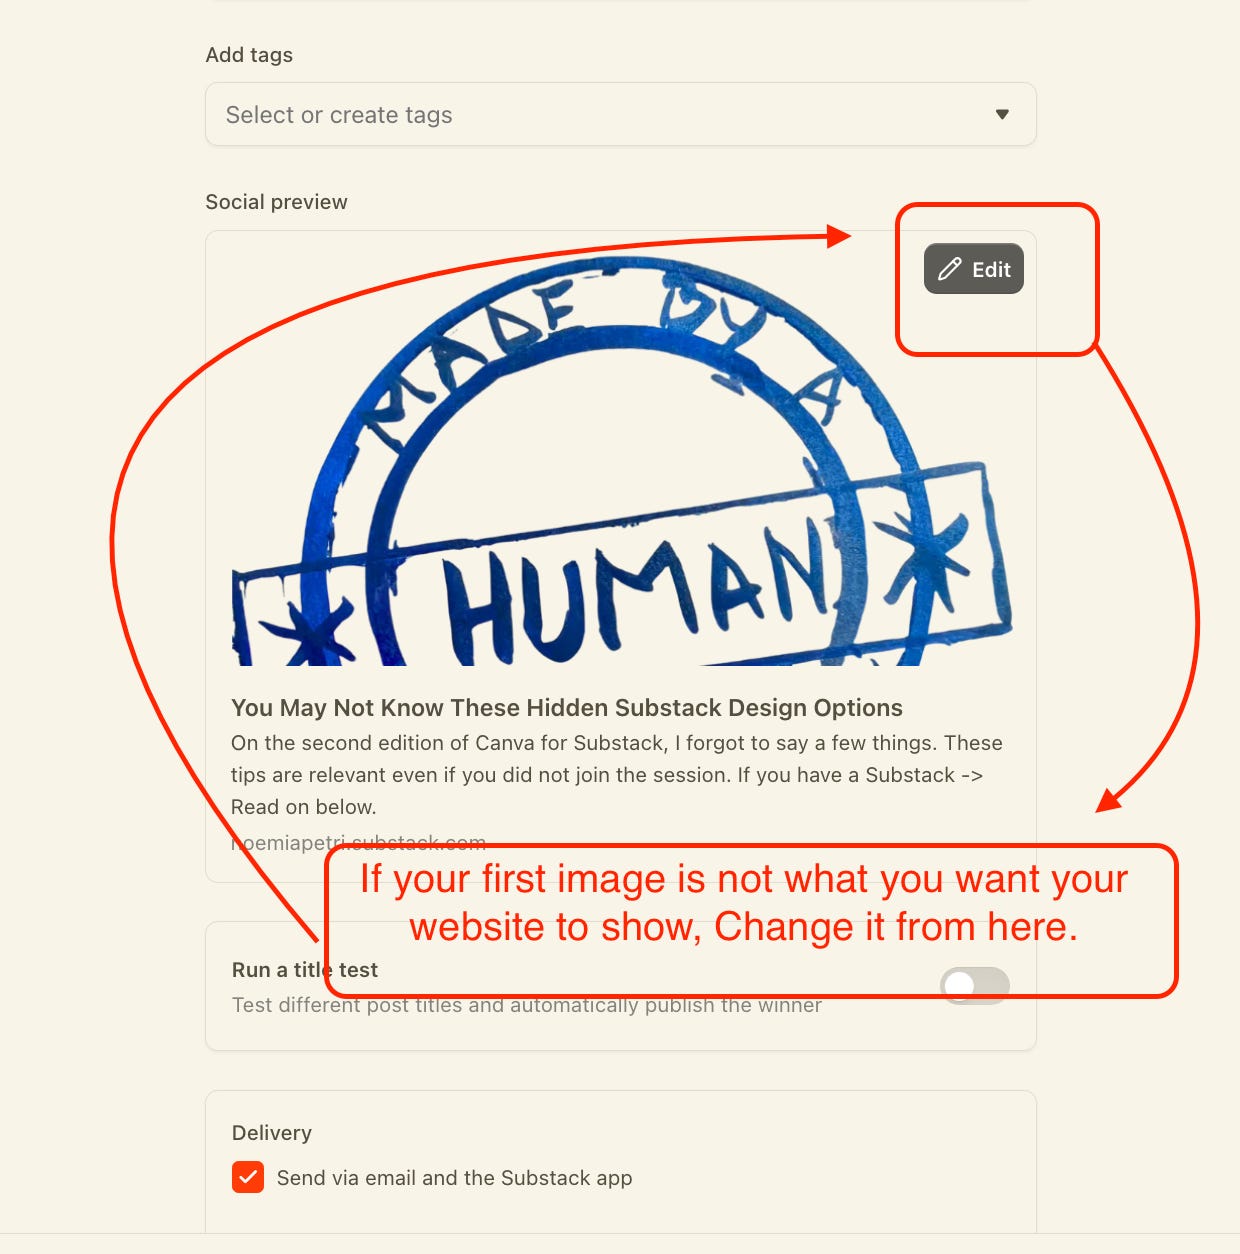
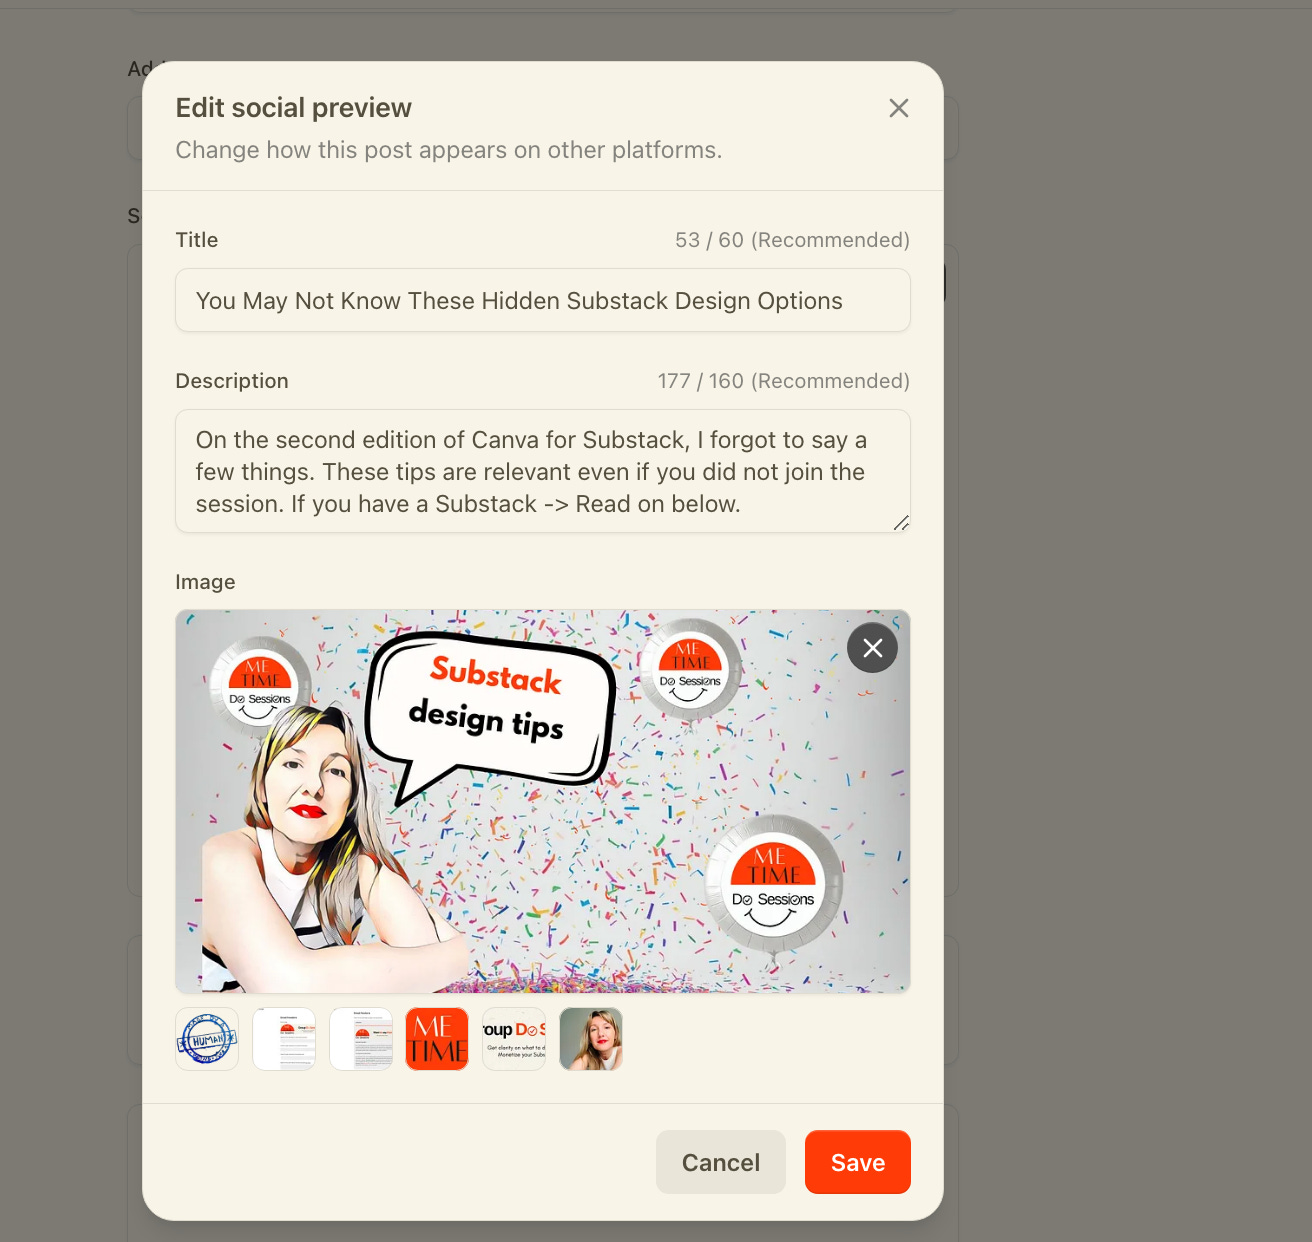
If you do not like the picture Substack has selected in the post. Or it doesn’t look good… before you publish your post you can edit the Social Preview. (You can also do it afterwards and no new emails will be sent no worries!). See the screen prints for the steps to edit the default article cover. Plus social preview text.
Step 2 - Press the x to remove the existing social preview.
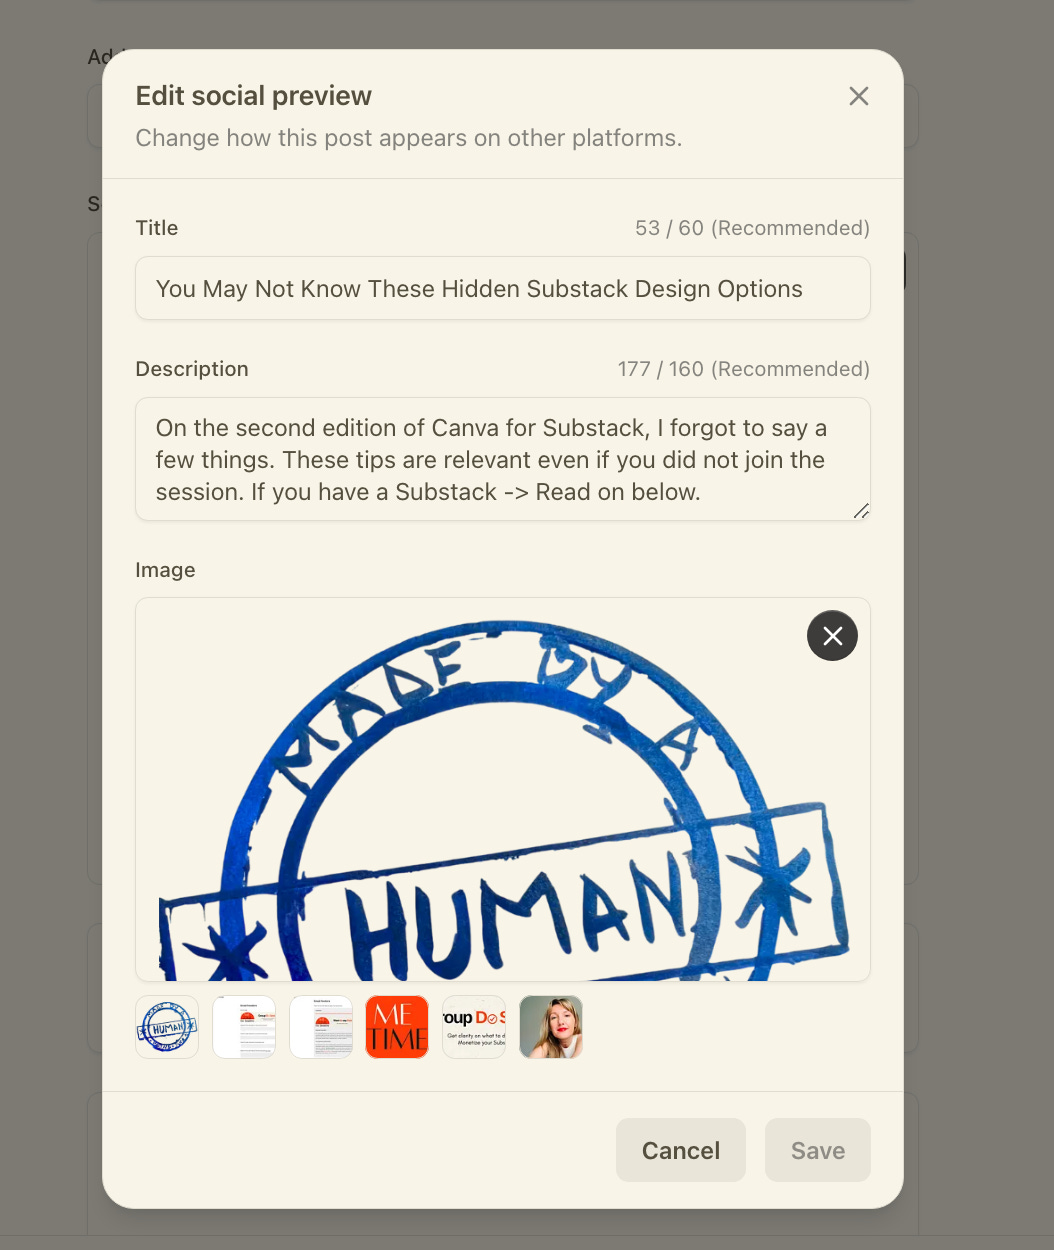
Step 3 Add another image
Hope these tips were helpful! For good karma re-stack, comment and like!
(This is still very relevant after the Substack publication design update on February 12th)
If you want access to the recorded workshop and the super cool 8 Canva templates with the guides to never have your image be cropped stupidly again…
Click on “Find out more”
If you want just one template to create Substack article pictures that don’t get cropped out in an annoying way. I have that as a separate purchase too. Click the below pic.


P.S. The template for the above signature is also in the above Canva workshop and templates package.
Just updated my header to reflect a change in the direction of my newsletter. Chat was able to suggest a design and then combine two existing images into one.
Thank you for this! I'll bring reading once I'm home and settled with dinner. This will help with the relaunch of my newsletter.